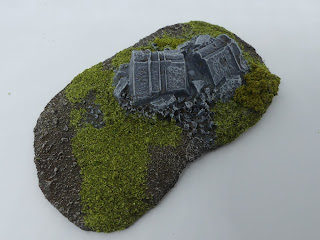
All credit for this goes to Mel the Terrain Tutor, whose excellent tutorials gave me the know-how to do this:
- I used the corrugated cardboard and polyfiller method of making bases from the Let's Make - Cheap & Easy Terrain Bases video
- And then used the decorating tips from Let's Make - Cheap & Easy Scenic CD Scatter Terrain Bases to add trees, bushes and flock scatter to them.
I'm very pleased with the results, and it's also held up well to being chucked in a cupboard for storage! In total there are 16 pieces of terrain, with the smallest about 2" in diameter and the largest about 12"x6"
Medium Ruin
Small Ruin
Medium Tree Stand
Medium Ruin
Stone wall
Small Ruin
Large Hillock
Rocky ground
Small tree stand
Small ruin
Small tree stand (spring green flock = not great!)
Small Ruin
Small terrain piece
Larger corner piece
Small ruin
Largest ruin
For future reference, the materials used are as follows:
- Bases: Corrugated cardboard packaging + Wickes Polyfiller
- Worked well, more time consuming than expected but would definitely use again
- Ruins: Games Workshop LOTR Ruins (discontinued)
- I'd accumulated a lot of these and am very pleased how they turned out. Ruins of Osgiliath would be the closest current equivalent
- Flock: Javis scenic scatter Rough Pasture (#JS19) & Spring Green (#71). The rough pasture was good, but the Spring Green is much too bright for my liking. I also used some Battlefields Grass Green (excellent) and some older lighter flock (which I would guess was from GW)
- Hedges: Javis Hedge Foliage Light Green (#JHF1) & Mid Green (#JHF2)
- Trees: Ebay 20x 7cm Green Trees, 20 x 9cm Green Trees & 10x 11cm / 9cm Bendable Trees. In terms of realism, only the 11cm trees are anywhere near the right scale, but if you ignore that fact they look pretty good for what I paid for them
Sort of believable with a foot model...
Definitely not believable with a mounted model!


No comments:
Post a Comment