Thursday, 31 March 2022

Frodo Baggins

My dad has asked me to paint him a Fellowship of the Ring, so where better to start than with the Ring Bearer himself. This is the first Frodo I've painted that I've actually been pleased with, so I thought it was worth noting down the colours I used for reference:

Skin:

  • Base: Cadian Fleshtone
  • Wash: Guilliam Flesh
  • Highlight: Cadian Fleshtone
  • Lips: Bugman's Glow
  • Eyes: White Scar & Abaddon Black
Hair:
  • Base: 50/50 Dryad Bark & Rhinox Hide
  • Highlight: 33/33/33 Dryad Bark, Rhinox Hide & Baneblade Brown
  • Edges: Above + Cadian Fleshtone
Jacket
  • Base: Rhinox Hide
  • Highlight: Rhinix Hide + increasing amounts of Baneblade Brown
  • Buttons: Zamesi Desert
Waistcoat:
  • Base: Rhinox Hide
  • Highlight: Skrag Brown
Trousers:
  • Base: Skavenblight Dinge
  • Wash: Nuln Oil
Backpack & Straps:
  • Base: Dryad Bark
  • Highlight: Dryad Bark + Baneblade Brown
Cloak:
  • Base: 75% Caliban Green + 25% Rhinox Hide
  • Highlights: Above + increasing amounts of Zamesi Desert
Metalwork:
  • Base: Ironbreaker
  • Highlight: Runefang Steel

Most of the above ideas were taken from the following videos, modified slightly for the colours I had available (particularly my lack of Gorthor Brown!):

Sunday, 9 January 2022

A Rohan Stronghold (building the houses)

Last year I treated myself to an early Christmas present and picked up the Rohan Stronghold boxset. I spent part of the Christmas break building up the Rohan House kits and I have finally finished making my buildings so I thought I would share the raw pictures before I paint them.

I borrowed heavily from the internet for inspiration, so if anyone else is looking for ideas here are some sources:

  • Zorpazorp's Stable, Blacksmith & Complex Houses - I didn't actually make any of these as I felt they were a bit kit-hungry (most use at least 2 kits for 1 building), but there's some great footage of how the kits were modded which was very helpful
  • GW "How to Build" Video - This was the first video I watched and has useful tips for building, plus a few examples. Again, I didn't actually build any of their variants as they used multiple kits per building, but if you wanted to make the 4-kit Great Hall, then this has the details.
  • Chaos Bunker's 'Ideas' Post - Some great pics of the Warhammer World exhibition showing various variants they made.
  • Paintbrush Pirate's Assembly Guide - I built the simple farmhouse from this guide
  • More example houses - I can't find the source for this, but I borrowed the idea of using porches to make stables from this Imgur post
  • Paints on a 4 up's Inn & Stables - This was posted after I finished building my houses, but I would be very tempted to make this 2-kit Inn if I ever got more kits.

1 - Standard House


This house was made pretty much exactly per the GW instructions - the only variance is that I centered the front door rather than offsetting it to one side.

2 - Great Hall


This was my first modified building, and is a Great Hall, made out of 2 House kits. The idea from this one was lifted straight from a post on the GBHL group on Facebook so I take no credit for the design, but it came together beautifully. I really like the big hall that GW made, but 4 kits was a bit too pricey for my liking, and when I discovered you could make one with just 2 kits that was an automatic "yes"! 

The side walls are standard (1 wall + 1 extension) and the back/front is easily assembled (the base layer is one wall + 2 extensions, or 2 full walls if you prefer, the second layer is one wall + 2 roof infills and the top is a standard 2 roof infills). The only fiddly part was the porch at the front - I used the standard porch side walls and one of the standard triangular top pieces, but the porch thatching isn't made to be doubled-up in the same way that the main roofing is. The fix was easy enough - I fitted the bottom thatch pieces as normal using the guides and then cut away the bottom part of each of the top thatch pieces until it fit in the gap. The main entrance door is the standard porch door, but just glued straight onto the front of the building to give it a bit of grandeur.

3 - Blacksmith


This is my blacksmith, with a forge, largely inspired by the GW conversion featured in the War In Rohan supplement. The forge itself is from Mantic. I was in two minds how to do this, and in the end settled for the representation of a blacksmith's, rather than a realistic working environment - my blacksmith has an anvil I will add when I paint everything up, but lacks key equipment such as tools, but the space was too small to really build a proper forge set up and I decided it looked better as a fairly clean area. 

The main conversion was made by simply omitting the side wall extensions and building a square 'house' then I paired up a couple of horses head pillars for each corner and used them to support the roof, and used the window triangle to keep it all square. This building also has a shorter entry porch than normal (I used the porch roofing for house #5), so I just used the triangular pieces of thatch and the standard front door and then filled in the gaps along the side with a couple of the pieces that are designed to join two walls together. It worked quite nicely and helps give this building a long, thin profile on the table.

4 - Farmhouse


This is my farmhouse build,  a simpler building for a rural Rohirrim with a covered outside area, maybe for storing grain or over-wintering a few animals. 

The basic building structure is the same as for the blacksmith above, but I left the endwalls open and cut down a couple of walls to make half-height surrounds for the area to show it's a permanent set up (the walls are left-overs from building the Great Hall, you could also use fences instead). I used a couple of fence pieces to indicate the yard area, but wanted to make it so a model could actually get through the opening by the main door, so I extended them with a few bits of balsa wood.

5 - Stables 


I think of this as a house for a richer Rohirrim, who likes to keep their horses close to home - there is a stable for 2 horses attached to the main house, and they have a good sized yard to turn them out into during the day.

The house is built as normal, but the door is glued directly to the end of the building, rather than being attached by a porch. I then used two porches (one borrowed from the blacksmith - #3 above) to build out the stable attachment (the roofs glue together very nicely for this). The backwalls are the standard porch walls, but I had to double-up on the joining pieces to get the length right for the roof. The end piece is a spare side-wall extension (also from the blacksmith). The front walls are the other two porch walls, but cut in half to make gates for the fronts of the stables, and I put a horses-head pillar in the middle to add a bit of support for the roof, and to make it look like there are two stalls. It's surprising how much difference doubling-up the porches makes to the footprint of the building and it adds a nice bit of variety to the layout.

Sunday, 2 January 2022

The Nine


These guys were really a finish from last year, but I only based them yesterday, so they snuck into 2022. I appear to have lost all my painting notes for these guys (the poor things sat there about 4 months waiting to be based), but the black cloaks don't look that great, so it's not a great loss! I shall have to have another go at painting black when I get onto the mounted versions...

Hobbit Hole


My first finish of 2022 is a Hobbit Hole for my Shire-folk to live in. I received the Forge World kit as a Christmas present and have used the Christmas / New Year holiday to get it all put together, and I couldn't be happier with the result.

I made the hill from 3 layers of  cheap expanded polystyrene, cut to shape with a stanley knife and fastened together with a hot glue gun. The base was then cut to size from foamboard and the edges were chamfered with a knife. To make the piece more hardwearing I covered all exposed surfaces with polyfiller then gave it a day to dry.

Next up was texturing the terrain - the path is made from greenstuff, and I used a roller from GreenStuffWorld to give it a cobblestone texture. The fence is made out of balsa wood and held together with hot glue - this was fiddly and took a lot longer than anticipated so I would try and find a better way to do this in the future.

To add a bit more texture to everything I covered the hill and base level in PVA glue and scattered a mix of modelling grit and other cork bits for texture. After that had dried for a few hours I brushed a layer of watered down PVA over the top to secure it in place.

I painted all the terrain with a mix of black & brown craft acrylic and then dry brushed it with a 'early gray' wall paint - it looks very stark here, but this is just to provide a base from the grass and it will be much more subtle when it's buried in flock!. I primed the hobbit hole with some brush on primer, then painted in Mechanicus Standard Grey.

I originally attempted to follow the painting guide in the Scouring of the Shire supplement for the hobbit hole pieces, which suggests dry brushing up from Mechanicus Grey to Administratum Grey and then using washes to colour the different areas (wood, tile etc), but the results were horribly washed out so I scrapped that plan and started over (I should have taken a picture, but was rather irritated with it at this point, so did not!). I ended up repainting the whole thing the normal way with the colours listed below and it came out much better the second time around.

Finally, to finish everything off I applied a liberal selection of grass tufts, lichen and flowers to make the garden at the front and to add a few bits of height to the hill. Once those were fixed in place I brushed glue over the rest of the exposed hillside and scattered a mix of various flocks over a bed of PVA with a few clumps of static grass for variety. Some of the lichen wasn't too keen to stick so I used a bit of super glue to keep it in place.

Tomorrow, after everything has dried, I will seal it all in place with a solution of water and PVA applied from a small spray bottle.

Painting Summary

Wood

  • Base Dryad Bark
  • Drybrush Baneblade Brown (light)
  • Wash Agrax Earthsade
Bricks:

  • Base 50/50 XV-88 & Dryad Bark
  • Wash Agrax Earthshade
  • Drybrush Baneblade Brown
Tiles:
  • Base Mournfang Brown
  • Highlight by adding varying amounts of Skrag Brown & Doombull Brown (for variation on tiles)
  • Wash Agrax Earthshade
Wall:
  • Base Baneblade Brown
  • Wash: Agrax Earthshade
Windows:
  • Base: Dark Reaper
  • Wash: Nuln Oil Gloss
  • Frames: Krieg Khaki

Door

  • Base Castellan Green
  • Drybrush Loren Forest Green (heavy)
  • Drybrush Elysian Green (light)
  • Wash Coelia Greenshade
  • Drybrush Elysian Green (light)
The flock, flowers and lichen were all things I already had - there are about 5 different blends of flock, 3 lichens, and about 10 different flowers / clump foliage. Most came from Woodland Scenics, Warpainter.net and Serious-play.co.uk

Thursday, 8 October 2020

Tree scatter terrain


I needed some additional scatter terrain for gaming, so I dug out my spare trees from a few years back and based them up. These are all based on 5mm foam, with a washer glued to the bottom to make them harder to knock over. I made stands of varying sizes, from singles up to triples and they offer some handy line of sight blocking and can be grouped together to make larger forested areas.

The bases were finished in the same way as my other scatter terrain.

Wednesday, 30 September 2020

Hedgerow


These hedges are made from rubberised horsehair (acquired from eBay). I cut slices about 1" thick, then based them on some foamboard.

I followed the instructions from Mel the Terrain Tutor's Modelling Hedge Substructures & Foliage video.

Tuesday, 22 September 2020

Farmer Maggot, Wolf, Fang & Grip


The teasers for the Quest of the Ringbearer inspired me to dig out some of my older minis and finally give them a lick of paint - Farmer Maggot is all ready to defend his crops from naughty hobbits this weekend!

Dobermans

  • Based in Eshin Grey
  • Washed with Nuln Oil
  • Recess shaded with Abaddon Black
  • Markings added with XV-88
  • Markings highlighted with XV-88 + Tallaran Sand
  • Teeth painted Screaming Skull
  • Collar painted Bloodreaver flesh with Stormhost Silver studs
Alsation
  • Based in XV-88
  • Washed with Agrax Earthshade
  • Coat highlighted with XV-88 + Tallaran Sand
  • Markings added with Abaddon Black
  • Teeth painted Screaming Skull
  • Tongue painted with Memphiston Red + Dryad Bark
  • Collar painted Bloodreaver flesh with Stormhost Silver studs

    Farmer Maggot

    • Tunic based with Ushbati Bone, washed with Agrax Earthshade & highlighted with Ushbati Bone
    • Underclothes based with Skavenblight Dinge, washed with Nuln Oil & highlighted with Stormvermin Fur
    • Flesh based with Cadian Fleshton, washed with Reikland Fleshtone & highlighted with mix of Cadian & Kieslev Flesh
    • Scythe based with Dryad Bark, washed with Agrax & hightlighted with Gorthor Brown
    • Scythe head based with Ironbreaker, washed with Nuln Oil & highlighted with Stormhost Silver
    Basing
    • Based with Stirland Mud

    Tuesday, 5 May 2020

    Serpent Horde - Horses


    Started work on the horses for my Haradrim Riders, but still need to paint up the riders. These were done from the guide put together by James Collard (Brushstroke), now featured on Warhammer Community.

    Paint Notes:

    Tan:

    • Base Steel Legion Drab
    • Highlight 50/50 Steel Legion + Screaming Skull
    • Wash Seraphim Sepia
    Light Gray
    • Base Dawnstone Grey
    • Wash Agrax Earthshade (recesses)
    • Highlight Administratum Grey (edges)
    Dark Brown:
    • Base Rhinox
    • Highlight Doombull
    • Wash Agrax
    • Highlight Doombull
    Tails (Grey & Brown)
    • Abaddon Black
    • Drybrush Dawnstone
    • Wash Nuln Oil
    Tails (Tan)
    • Zandri Dust
    • Drybrush Screaming Skull
    • Wash Agrax
    Tack:
    • Baneblade Brown
    • Agrax Earthshade
    Cloth:
    • Mephiston Red
    • Druchii Violet
    Saddle:
    • XV-88
    • Agrax Earthshade
    Armour:
    • Balthasar 
    • Agrax Earthshade


    Thursday, 30 April 2020

    The Serpent Horde


    I've been dreaming of this army for a long time, so it's been great to finally get the painting underway - my desert Haradrim.

    Painting Notes:

    White Cloth:

    • Base with Screaming Skull x 2 coats
    • Wash with Seraphim Sepia
    • Highlight with Screaming Skull
    Armour
    • Base with Balthasar Gold
    • Wash with Agrax
    • Highlight with Retributor Armour
    Wrappings
    • Base with Baneblade
    • Wash with Agrax
    Red Cloth:
    • Base with Memphiston Red
    • Wash with Druchi Violet
    • Highlight with Memphiston Red
    Flesh:
    • Base with Catachan Flesh
    • Wash with Agrax
    Boots:
    • Base with XV-88
    • Wash with Agrax
    Hair:
    • Base with Abaddon Black
    • Highlight with Eshin Grey

    Bases
    • Cover in Agrellan Earth and let dry
    • Add patches of Armageddon dust / dunes
    • Paint with thinned Tallarn Sand
    • Wash with 50/50 Agrax + Seraphim Sepia, diluted with a little water
    • Pick from:
      • Warpainter.net Scrub Grass 6mm
      • Warpainter.net Dry Grass 6mm
      • Gamersgrass 12mm Tufts - Spikey Beige
      • Gamersgrass 2mm - Beige
      • Serious Play Brown Lichen

    Friday, 20 March 2020

    They have a Troll (or two)


    As I approached the end of my Pelennor fields army it was time to tackle the Trolls. I have tried to paint trolls a couple of times in the past, but have always given up in frustration so I was determined to make it work this time.

    With the Grand Tournament streaming behind me I broke out the GW Mordor Troll painting guide and followed it through with a few adjustments to fit my mini.

    Paint Scheme:
    • Prime with Vallejo Grey Surface Primer
    Skin

    • Basecoat with Bugman's Glow
    • Wash with Reikland Fleshshade
    • Highlight with Bugmans Glow with increasing amounts of Cadian Fleshtone mixed it.
    • Detail with thinned Cadian Fleshtone (lots of little tiny lines for texture)
    Scales
    • Basecoat Dryad Bark
    • Wash Agrax Earthshade
    • Heavy Drubrush Gorthor Brown
    • Stipple edges of region with Gorthor Brown to blend into skin
    Chest Harness & Straps
    • Basecoat Rhinox Hide
    • Wash Agrax Earthshade
    • Highlight Doombull Brown
    Cloth
    • Basecoat 50/50 XV-88 & Dryad Bark
    • Wash Agrax Earthshade
    • Highlight XV-88 / Dryad Bark + increasing amounts of Baneblade Brown mixed in
    Armour
    • Basecoat Ironbreaker
    • Wash Reikland Fleshshade
    • Highlight Ironbreaker
    Nails
    • Basecoat Baneblade
    • Wash Agrax Earthshade
    • Highlight Baneblade + Screaming Skull
    Rocks
    • Basecoat Mechanicus Standard Grey
    • Drybrush Administratum Grey
    • Drybrush Dawnstone
    Basing
    • Basecoat Stirland Mud
    • Drybrush Tyrant Skull
    • Add Tufts (Warpainter Scrub Grass small / standard tufts)
    • Paint Base Rims Steel Legion Drab

    Saturday, 4 January 2020

    New year, renewed motivation

    So, not quite the start of the new year, but still - a good time to renew my hobbying and work on finally finishing off that Morannon Orc army I started *checks history* over a year ago.

    Sunday, 26 May 2019

    May Update

    I hadn't realised how many months had passed since I last painted. I hit a bit of a mental block in February after stocking up on all the re-released models - I was determined to stick to my plan of painting more than I bought, but that meant I needed to clear out another 40 models, and my Morannon force was all about slower detailed painting which meant that it was (seemingly) going to take forever.

    So I had a cunning plan - put aside my current project and paint up a batch of Uruk-Hai as they're quick and easy... Unfortunately it turned out that holding myself to arbitrary rules and painting random models to achieve them utterly killed my motivation and left me in a slump where I didn't actually finish anything in February (although I do now have a lot of half-painted Uruks!).

    I took a detour from painting in March when I read 'The life changing magic of tidying' by Marie Kondo and asked myself if my LOTR collection 'sparked joy' for me. The answer was fortunately yes, but not as a pile of boxes shoved into an overflowing storage unit. To fix this I embarked on a major project to document every model I have, organise them into game-legal armies, and then build the miniatures.

    The end result is that I have now built every single model I own and they are now sitting proudly in a couple of display bookcases where I can (just about) see all of them. I feel so much better about my collection now that I can see it on display, instead of feeling vaguely guilty about the sheer number of models I had amassed and never done anything with.


    Another bonus was that by selling my surplus models I made exactly the right amount of money to reinvest in GW's April 'made to order' run and now have 30 more previously out of print models coming my way...

    I've also come up with a cunning new plan - paint what I want, when I want, and buy what I want, when I want (within reason!). In particular, I plan to plug the gaps in my newly written army lists, which should keep my wallet busy for some time.

    Oh, and I painted something this month - one Morannon Orc Captain (foot & mounted)


    And purely because I like statistics:
    MonthBoughtPainted
    January422
    February00
    March00
    April300
    May02
    Total724

    Saturday, 2 February 2019

    January Update

    It was a slow start to the year, marred with illness and a dodgy neck which kept me away from the painting table.

    On the plus side, we did make it a little further through the introductory games in the Pelennor Fields boxset and determined that the Witch King on Fellbeast is excellent at killing Horsies....

    I'm working on the Morannon Orc heroes at present and the only ones I'm claiming as finished this month are the Banner Bearer and the Drummer. I've done a fair amount on the others so hopefully I'll have some early finishes in February to get me back on track!


    A lot of the previously OOP models made it back into the webstore in January and as a result I totally blew my plan to buy less than I painted. I'm totally okay with that though as I've been waiting years to get my hands on some of these and it's brilliant to finally have them in my collection.

    Painted: 2 Models: Morannon Orc Banner Bearer and Orc Drummer

    Bought - 42 Models: Forlong, Angbor, Duinhir, Dalaymar, Corsair Captain, Corsair Bosun, 6 Corsair Alabasters, 24 Corsairs, 6 Numemor Bowmen

    Monday, 31 December 2018

    2018 - the year in review

    Well, what a difference a year makes.... Okay, well, 3 months if I'm being honest. January to September were pretty quiet but since the Pelennor Fields boxset and the new rules were released I've found a re-invigorated love for the hobby.

    Summary for the year:

    Army of the Dead - painted a 700 point army including King of the Dead, 30 Warriors of the Dead and 6 Riders of the Dead (694 Points in total). It could use a Banner and an Aragorn, but is technically playable as-is.


    Morannon Orcs - painted 36 Morannon Orcs and 6 Wild Wargs and purchased / build the rest of a 1000pt army. Finishing this will be top priority for 2019.


    With a total of 79 models painted I have finally achieved my target of at least one model per month (if you average it out!).

    Target for next year - consistently paint at least one model each month!

    I'm keeping my target low as December has shown me that sometimes life gets in the way of hobby and things just don't work out. Having been on a roll in October and November I almost failed to finish a single model in December and only some last-minute New Years Eve painting has kept me on track. Still, it was a nice way to spend the day!

    Summary for the year

    MonthBoughtPainted
    September840
    October1431
    November2242
    December06
    Total12079

    I gave myself a pass for the September purchase of the Pelennor Fields boxset, so that's a win for painting more than I bought each month as well

    2018 - December Update


    A quieter month this month - work was manic, plus I managed to be ill for about 3 weeks with a combination of stomach bug and cold (which sucked, but was kind enough to clear for a couple of days over Christmas before coming back with a vengeance!)

    I started the month fairly well and managed to build and prime most of the rest of the models for my Morannon force, including a few little conversions. The only unbuilt model is the Catapult & Crew.

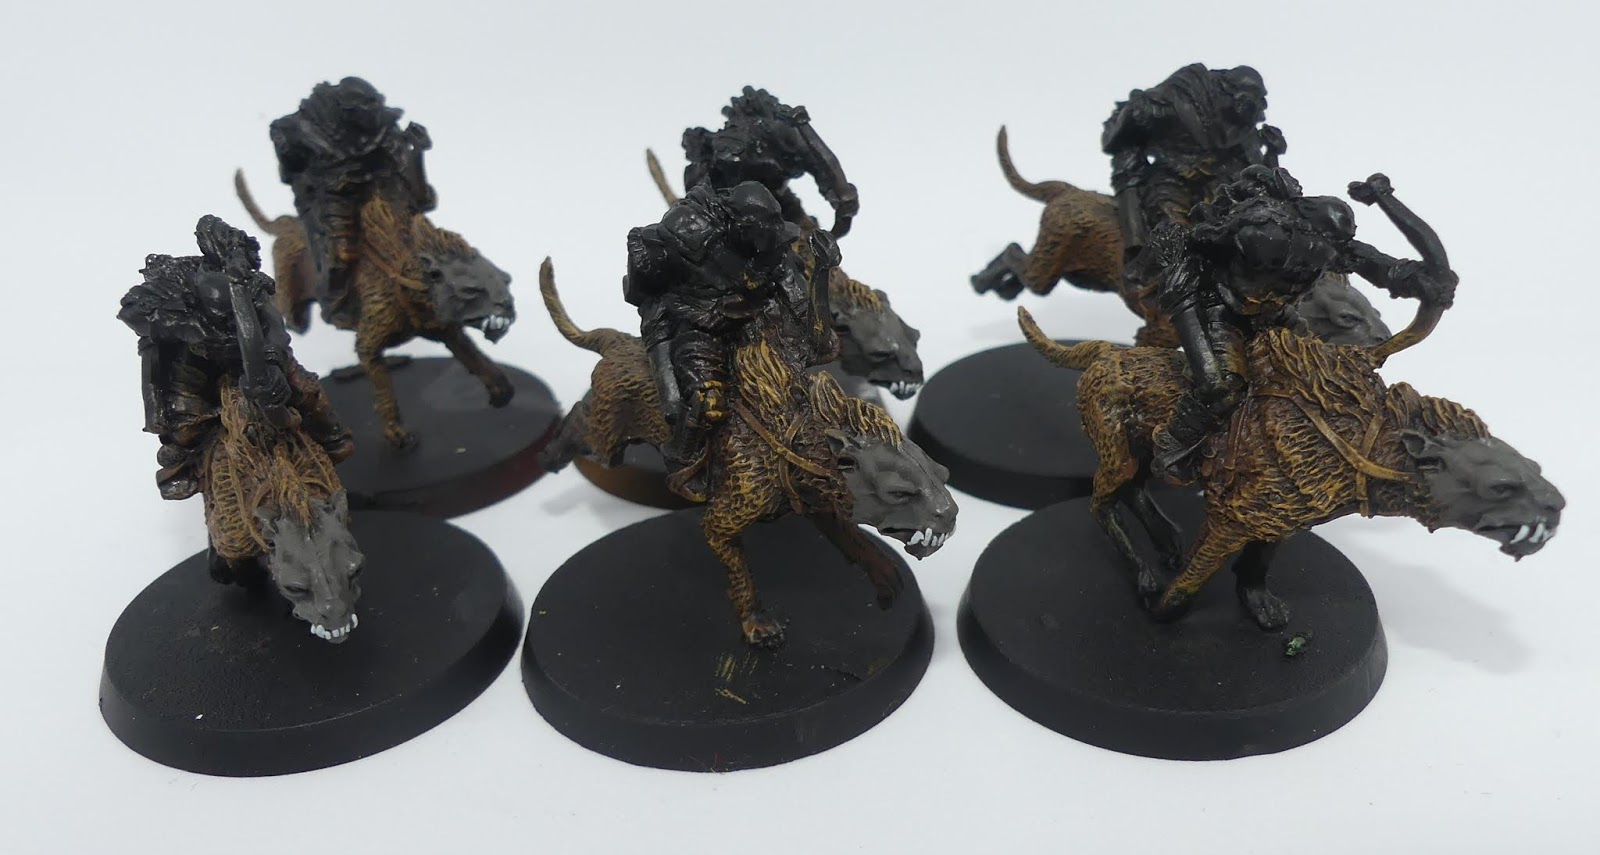
    Not a lot of painting done this month, but I did manage to finish 6 off my wild wargs today to avoid a complete wash-out. I've also painted the rest of the wargs and 'just' need to do their riders and tack.

    6 Metal Warg Riders, to be played as Mounted Orc Trackers

    1 converted Morannon Orc Captain (the old Gothmog Model with a head swap from a Siege Uruk-Hai that's been 'sculpted' a bit with a scalpel)

    Gothmog Mounted

    Banner Bearer & Drummer

    6 Orc Trackers

    Guritz & Gothmog's Enforcer (1 spare, but seemed a shame to leave him in the box!)

    1 Mordor Troll, with interchangeable hands. Painted with primer as it got too cold to spray paint.

    Painted - 6 Wild Wargs (dismounts)

    Bought - None

    Gifted - Shelob, Sam & Frodo

    Wild Wargs


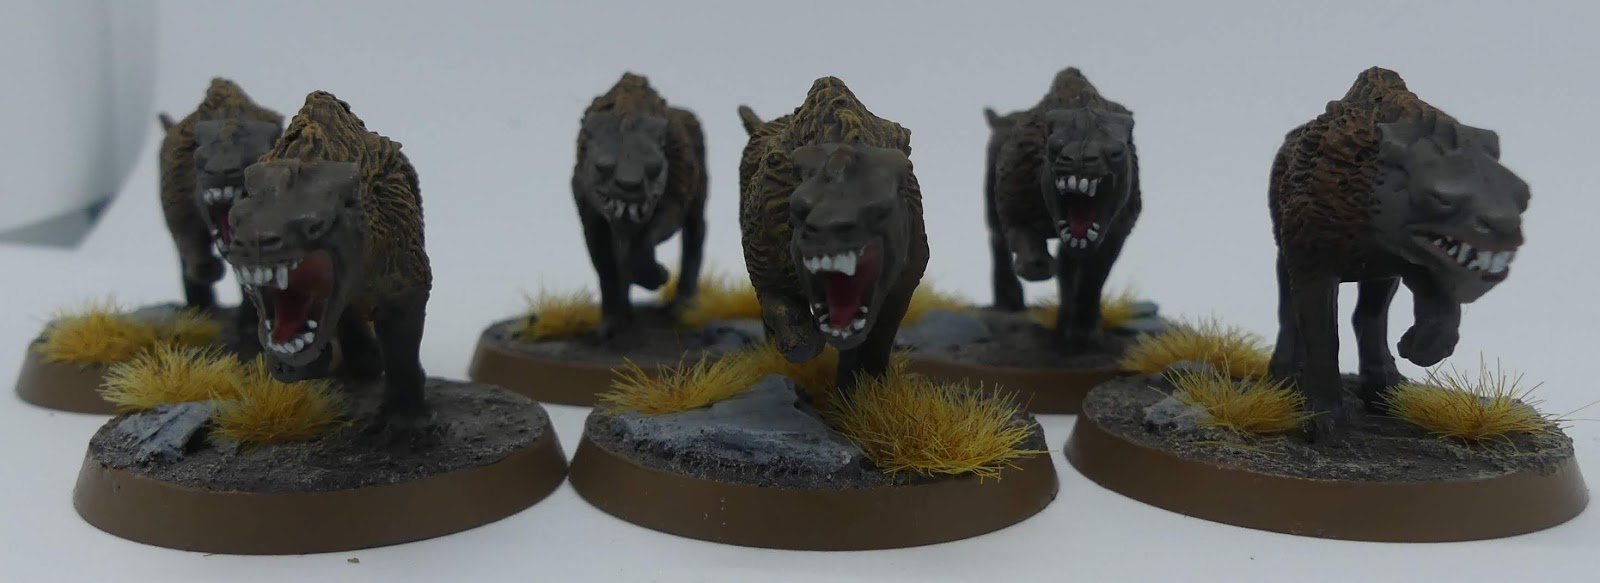
    My sneaky finish with 3 and a half hours left in December - 6 Wild Wargs, based over the course of the day as I was determined to get something finished this month!

    I picked a very simple scheme for the Wargs which is almost entirely drybrushing / washing. The main areas of the wargs were very quick to paint and the only areas which took time to paint were the mouths and teeth, which were fiddly as they're not very well moulded. Once I decided on the paint scheme I reckon these were about 10 minutes a piece to paint.


    There was quite a lot of prep work on these though - the metal warg riders had legs to attach and gap-fill and the plastic dismounts have some very obvious lines in their fur and a peculiar lack of detail on the rear of their backs. I probably spent about 20 minutes per warg green-stuffing but I think it was time well spent as it makes them look a lot better than they do out of the box. Thankfully fur is fairly simple to sculpt, and very forgiving of mistakes!


    There aren't actually any Wild Wargs in my Mordor Army list, but these six will serve as dismounts for the Mounted Orc Trackers. I've also painted the six mounted wargs, but not their riders, so they'll hopefully be finished in January.


    Wargs
    • Basecoat - Abaddon Black
    Fur
    • Heavy Drybrush - Dryad Bark
    • Medium Drybrush - Mournfang Brown
    • Light Drybrush - Balor Brown (top half of warg only)
    Mouth
    • Tounge - Memphiston Red, wash Agrax Earthshade
    • Teeth - Celestra Grey, wash Agrax Earthshade, highlight Ulthuran Grey
    • Mouth - Bugmans Glow, wash Agrax Earthshade
    Flesh
    • Face - Stormvermin Fur, wash Nuln Oil, drybrush Stormvermin Fur
    • Legs - Drybrush Strormvermin
    Bases (as per Morannon Orcs, but with added slate chippings)
    • Stirland Mud
    • Drybrush Tyrant Skull
    • Add Tufts (Warpainter Scrub Grass small / standard tufts)
    • Paint Base Rims Steel Legion Drab
    • Paint Rocks Mechanicus Standard Grey, drybrush Administratrum Grey, drybrush Celestra Grey

    Saturday, 1 December 2018

    2018 - November Update

    It's been a good month this month - having completed the Army of the Dead last month I decided to keep working through the Pelennor Field boxset and paint up the Morannon Orcs so that there were some Evil models to match against them.

    I stuck with a very by-the-book theme for the Morannons but it worked nicely and let me paint them up quite quickly too.

    Buoyed by my success I decided to develop it into a full 1000pt army of Mordor - with a bit of help from the GBHL I've decided on the following:

    Gothmog on Warg
    14 Morannon orcs (7 shield, 7 shield/spear)
    1 Morannon orc w/ Banner

    Guritz on Foot
    12 Morannon orcs (6 shield, 6 spear/shield)

    Morannon Orc Captain on Warg
    10 Morannon orcs (5 shield, 5 spear/shield)
    1 Mordor Troll
    Orc Drummer

    1 Mordor Orc Catapult with Troll

    Orc Captain on Warg
    6 orc trackers on Warg

    So I did some shopping and picked up the remaining models I needed for my force (Gothmog, Guritz, 6 Orc trackers and the Orc Catapault. I've also built and primed all the remaining models for the force from my collection.

    I also painted up 6 Riders of the Dead to reinforce the Army of the Dead from last month.

    Painted - 42 Models: 36 Morannon Orcs & 6 Riders of the Dead

    Bought - 22 Models:  Gothmog Ft & Mtd, Erestor, 6 Riders of the Dead, Mordor Orc Catapault (5 models), 6 Orc Trackers, Guritz & Gothmog's Enforcer

    Friday, 23 November 2018

    Reinforcements Have Arrived

    My Army of the Dead needed some faster units so I've added a small detachment of cavalry to assist them - 6 Riders of the Dead now all painted up and ready for battle.


    Note to self: repaint the base rims!

    Monday, 19 November 2018

    Morannon Orcs


     I painted up the 36 Morannon Orcs from the Pelennor Boxset with the aim of working on my accuracy and speed painting skills - originally I was aiming to spend about 5 minutes per model but I missed that target and spent about 12 minutes each for a total of  just over 7 hours. That's still considerably faster than anything else I've painted to date so I'm pretty pleased with my experiment. I could have saved about an hour by priming with Silver Spray but didn't have any.

    I went with a fairly simple scheme and painted the entire army was one large batch, applying each colour to every model in turn. I've always painted in small batches before (maybe 6-8 models) so doing 36 in one go was rather different, but I actually really liked it as I could see the progress being made and everything got finished at the same time.


    Broadly, the timings per model worked out at as follows:

    • 2 mins to base silver, wash & drybrush
    • 2 mins to base red & wash
    • 2 mins to base grey, wash & highlight
    • 2 mins to base faces, wash & highlight
    • 1 min to paint, wash & highlight hair & fur
    • 2 mins to paint & highlight straps (fiddly!)
    • 1 min to paint & highlight wood areas

    The Paint Scheme for future reference was as follows:
    • Prime with Abaddon Black Spray
    Armour
    • Basecoat with Ironbreaker
    • Wash with Reikland Fleshshade
    Red Cloth
    • Basecoat with Memphiston Red (2 coats needed)
    • Wash with Druchi Violet
    Grey Cloth
    • Basecoat with Skavenblight Dinge
    • Wash with Nuln Oil
    • Highlight with Stormvermin Fur
    Skin - Variant 1
    • Basecoat with Baneblade Brown
    • Wash with Agrax Earthshade
    • Highlight with Baneblade Brown
    Skin - Variant 2
    • Basecoat with Doombull Brown
    • Wash with Agrax Earthshade
    • Highlight with Skrag Brown
    Skin - Variant 3
    • Basecoat with Catellan Green
    • Wash with Agrax Earthshade
    • Hightlight with Elysian Green
    Hair
    • Basecoat with Eshin Grey
    • Wash with Nuln Oil
    • Highlight with Dawnstone
    Fur
    • Basecoat with Mournfang Brown
    • Wash with Agrax Earthshade
    Wood
    • Basecoat with Dryad Bark
    • Highlight with Steel Legion Drab
    Straps
    • Basecoat with Dryad Bark
    • Highlight with Gorthor Brown
    Basing
    • Apply coat of Stirland Mud
    • Drybrush Tyrant Skull
    • Add Tufts (Warpainter Scrub Grass small / standard tufts)
    • Paint Base Rims Steel Legion Drab